Keeping your home secure with a smart lock is easy when you know how to maintain a smart lock. A smart lock is an electronic lock that connects to your smartphone or smart home system via WiFi or Bluetooth, offering keyless entry, remote access, and features like keypad codes or fingerprint scanning. In 2025, smart locks are more reliable and user-friendly, making them a top choice for modern home security.
Why focus on how to maintain a smart lock? Regular maintenance ensures your lock remains functional, prevents lockouts, and extends its lifespan. This beginner-friendly smart lock setup guide covers smart lock installation, app connection, maintenance, and troubleshooting, tailored for wooden doors. Whether you’re new to DIY smart lock installation or enhancing your smart home, this guide helps you install smart lock on wooden door and keep it in top shape. Let’s dive into setting up and maintaining your smart lock!
What You Need Before Installing
Before exploring how to maintain a smart lock, proper preparation ensures a smooth smart lock installation. Gathering tools and checking compatibility sets the foundation for a successful DIY smart lock installation and long-term maintenance.
Tools Required: Most smart locks are designed for easy setup with common household tools, including:
- Phillips screwdriver (sizes #1 and #2) for securing and removing screws.
- Flathead screwdriver for prying off old hardware.
- Tape measure to verify door dimensions.
- Drill with bits (if modifications are needed, though most fit standard deadbolt holes).
- Pencil for marking alignments.
- Optional: Level for straight installation and safety glasses.
These tools, found in most home toolkits, make how to maintain a smart lock and installation accessible. For install smart lock on wooden door, use wood-friendly tools to avoid damaging the door’s finish.
Compatibility Checks: Confirm your door’s suitability. Measure thickness (1-3/8 to 2 inches) and borehole sizes (2-1/8-inch face bore, 1-inch edge bore). For wooden doors, ensure the wood is solid around the lock area for stability. For connect smart lock to WiFi or Bluetooth, verify your phone (iOS or Android) supports the lock’s app. Test WiFi signal strength at the door (use 2.4GHz, as many locks don’t support 5GHz). If integrating with smart home hubs like Alexa or HomeKit, check compatibility for seamless operation.
Power Needs: Most smart locks use four AA or AAA alkaline batteries, lasting 6-12 months. Keep spares for smart lock battery replacement, a key part of how to maintain a smart lock. Some models include a physical key for backup. For exterior doors, choose weatherproof locks to protect electronics. Review the smart lock user guide for model-specific details, as brands like Yale, August, or Schlage provide app-based tutorials or QR codes for maintenance and setup videos. Preparation takes 15-20 minutes but ensures a reliable setup.
Step-by-Step Installation Guide
This guide on how to maintain a smart lock covers the full smart lock installation process, tailored for wooden doors with standard deadbolts, and includes maintenance steps to keep your lock functioning smoothly.
Step 1: Removing the Old Lock
Begin by replacing door lock with smart lock by removing the existing hardware.
- Open the door for easy access to both sides. Locate screws on the interior thumb turn or plate.
- Use a Phillips screwdriver to remove screws and detach the interior assembly.
- Slide the deadbolt mechanism out from the door’s edge.
- Remove the exterior cylinder or knob, unscrewing fasteners. If it’s a keyed lock, insert the key to release it.
- Unscrew the strike plate from the door frame.
This takes 5-10 minutes. If stuck, gently pry with a flathead screwdriver, avoiding damage to the wood for install smart lock on wooden door.
Step 2: Preparing the Door
Prepare the door for your new smart lock.
- Clean the deadbolt hole with a vacuum or cloth to remove debris.
- Verify borehole sizes (2-1/8-inch face, 1-inch edge). Adjust with a drill if needed, though most fit standard setups.
- Test-fit the new deadbolt, ensuring smooth extension and retraction.
This step, taking 5-10 minutes, is crucial for install smart lock on wooden door to prevent misalignment due to wood warping.
Step 3: Installing the Smart Lock
Mount the smart lock hardware.
- Insert the deadbolt into the edge hole, aligning “up” markings, and secure with screws.
- Attach the exterior assembly (keypad, touchscreen, or scanner), feeding cables through the borehole.
- Secure the interior mounting plate, connecting cables to the interior unit.
- Attach the interior assembly over the plate and screw it in place.
- Install the strike plate on the door frame, aligning with the deadbolt.
Follow the smart lock user guide for model-specific adapters. This takes 20-30 minutes.
Step 4: Connecting with the App and Phone
Setting up the app is essential for maintenance tasks like monitoring battery levels. This step focuses on smart lock app connection.
- Download the manufacturer’s app (e.g., Yale Access, August Home, Schlage Home) from the App Store or Google Play.
- Create an account and follow prompts to add a new device.
- Put the lock in pairing mode, typically by pressing a button on the interior unit (see smart lock user guide).
- For WiFi models, connect smart lock to WiFi: Select your 2.4GHz network, enter credentials, and wait for confirmation. Bluetooth models pair directly with your phone.
- Calibrate lock/unlock functions and enable features like auto-lock, guest access, or battery alerts.
- Test app connectivity by locking/unlocking remotely (WiFi models) or via Bluetooth.
Ensure your phone’s WiFi or Bluetooth is active and you’re near the door. If signals are weak, move your router closer or use a WiFi extender. This takes 10-15 minutes.
Step 5: Testing Functionality
Test the lock to ensure it’s ready for maintenance.
- Manually lock/unlock from both sides to confirm smooth operation.
- Test keypad codes, fingerprint scanning, or app-based unlocking.
- Use the app to lock/unlock remotely (WiFi models) or via Bluetooth.
- Verify notifications (e.g., door opened or low battery) on your phone.
- Test smart home integration, like voice commands with Alexa, if applicable.
Testing takes 5-7 minutes and ensures your smart lock installation is reliable for ongoing maintenance.
Step 6: Maintaining and Troubleshooting
Here’s how to address how to maintain a smart lock and handle common issues with this smart lock troubleshooting guide.
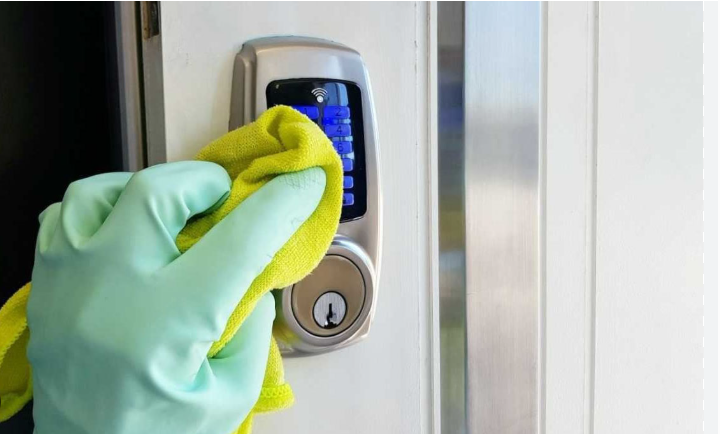
- Regular Maintenance: Check battery levels monthly via the app. Perform smart lock battery replacement with fresh AA/AAA batteries every 6-12 months. Clean the lock’s exterior and keypad with a dry cloth to remove dirt or debris. Lubricate the deadbolt with graphite spray every 6 months to ensure smooth operation. Update firmware regularly through the app to maintain security and performance.
- Connection Issues: If the app fails to connect, restart it and the lock. Ensure a 2.4GHz WiFi network for connect smart lock to WiFi. For Bluetooth, keep your phone within 30 feet. Update the app or firmware.
- Deadbolt Sticking: Realign the strike plate or lubricate the bolt. Tighten loose screws to maintain alignment.
- App Errors: Reinstall the app or perform a factory reset (check smart lock user guide).
- Unresponsive Lock: Check battery levels. If dead, use the physical key or a 9V battery on external terminals (if supported) to restore power.
For persistent issues, consult manufacturer support or online forums. Regular maintenance ensures how to maintain a smart lock is straightforward.
Tips for Successful Installation
With your guide on how to maintain a smart lock complete, these tips ensure a lasting DIY smart lock installation and ongoing reliability.
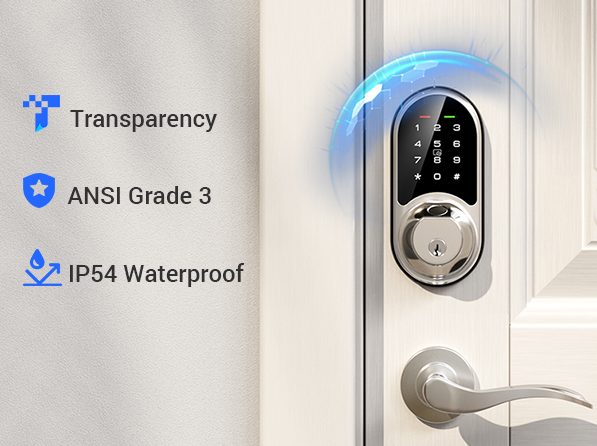
Security Considerations: Choose a smart lock with strong encryption (e.g., AES-128) to prevent hacking. Enable two-factor authentication in the app and use secure keypad codes. Regularly update firmware to patch vulnerabilities. For exterior wooden doors, select weather-resistant models to protect electronics and simplify maintenance.
WiFi/Bluetooth Signal Placement: Position the lock where signals are strong. Wooden doors are ideal, as metal can interfere. Test signal strength for connect smart lock to WiFi. Use a WiFi extender if needed. For Bluetooth, ensure your phone is within range during app use to monitor maintenance alerts.
Safety Precautions: Install with the door open to avoid lockouts. Store the backup key securely and share its location with a trusted contact. Teach household members about maintenance tasks like battery checks. For smart lock battery replacement, set reminders every 6 months and use app alerts to prevent disruptions.
Additional Tips: Schedule maintenance checks (e.g., battery and firmware updates) in your calendar. Integrate with smart home devices for automation, like lights activating on unlock. Read model-specific reviews to anticipate maintenance needs. Sync multiple locks for centralized app control. These tips enhance your smart lock setup guide and make how to maintain a smart lock effortless.
Frequently Asked Questions
Questions about how to maintain a smart lock? Here are answers to common concerns.
What Happens When the Battery Dies?
Most smart locks include a physical key for backup. Some support temporary power via a 9V battery to external terminals. App alerts notify you for smart lock battery replacement. Use fresh alkaline batteries to avoid leaks.
Does It Work Without Internet?
Yes, keypad and Bluetooth functions work offline. WiFi-dependent features like remote access or maintenance alerts require internet. Bluetooth models support app control via phone proximity.
Do You Need Professional Installation?
No, this DIY smart lock installation guide suits most users. Professionals are only needed for complex doors, saving $50-150.
Additional FAQs: For smart lock troubleshooting, check app error codes or consult manufacturer support. For renters, many smart locks are removable without damaging the door.
Conclusion
Mastering how to maintain a smart lock ensures your lock stays reliable, enhancing home security with minimal effort. This smart lock installation guide covers smart lock app connection, maintenance, and troubleshooting, empowering you to install smart lock on wooden door and keep it in top condition in 2025. DIY saves money and offers a tailored smart home experience.
Embrace this smart lock setup guide for lasting security. Explore more options at smart lock to elevate your smart home today!