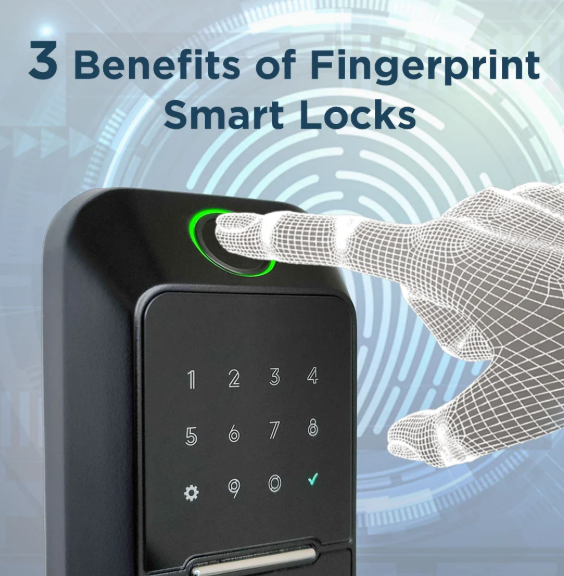
Ready to upgrade your home security with cutting-edge technology? This comprehensive guide on how to use a fingerprint door lock walks you through the installation and setup process for a seamless experience. A smart lock with fingerprint recognition offers keyless entry, allowing you to unlock your door with a touch, alongside features like remote access and smart home integration. In 2025, fingerprint door locks are increasingly popular for their convenience and enhanced security, eliminating the need for keys or codes.
Why learn how to use a fingerprint door lock? These devices provide quick access, track entry logs, and integrate with apps for remote control. This guide is tailored for beginners, focusing on smart lock installation for wooden doors, a common choice for homes. We’ll cover everything from gathering tools to troubleshooting, ensuring you master how to use a fingerprint door lock with confidence. Whether you’re replacing an old lock or upgrading your smart home, this smart lock setup guide has you covered. Let’s get started!
What You Need Before Installing
Before diving into how to use a fingerprint door lock, preparation is key to a smooth smart lock installation. Gathering the right tools and checking compatibility ensures your DIY smart lock installation goes off without a hitch. Here’s what you need.
Tools Required: Fingerprint door locks are designed for easy setup with basic tools, including:
- Phillips screwdriver (sizes #1 and #2) for screws.
- Flathead screwdriver for removing old hardware.
- Tape measure to verify door dimensions.
- Drill with bits (if modifications are needed, though most fit standard deadbolt holes).
- Pencil for marking positions.
- Optional: Level for alignment and safety glasses.
These tools are common in home kits, making how to use a fingerprint door lock accessible for beginners. For install smart lock on wooden door, ensure tools are wood-friendly to prevent splintering.
Compatibility Checks: Confirm your door’s suitability. Measure thickness (1-3/8 to 2 inches) and borehole sizes (2-1/8-inch face bore, 1-inch edge bore). For wooden doors, verify the wood is solid around the lock area. Check if the lock uses WiFi (2.4GHz, not 5GHz) or Bluetooth, and test signal strength for connect smart lock to WiFi. Ensure compatibility with smart home systems like Alexa or HomeKit if desired.
Power Needs: Most fingerprint locks use four AA or AAA batteries, lasting 6-12 months. Some have rechargeable options. Keep spares for smart lock battery replacement. For exterior doors, choose weatherproof models. Review the smart lock user guide for model-specific details, as brands like Yale or Schlage provide app-based instructions. This preparation, taking 15-20 minutes, sets you up for success in how to use a fingerprint door lock.
Step-by-Step Installation Guide
This detailed guide on how to use a fingerprint door lock covers the full smart lock installation process, tailored for wooden doors with standard deadbolts. Follow these steps for a secure DIY smart lock installation.
Step 1: Removing the Old Lock
Start by replacing door lock with smart lock by removing existing hardware.
- Open the door for access. Locate screws on the interior thumb turn or plate.
- Use a Phillips screwdriver to remove screws and detach the interior assembly.
- Slide out the deadbolt from the door’s edge.
- Remove the exterior cylinder or knob, unscrewing fasteners. Use the key if needed to release it.
- Unscrew the strike plate from the door frame.
This takes 5-10 minutes. If stuck, gently pry with a flathead screwdriver, avoiding damage to the wood.
Step 2: Preparing the Door
Prep the door for your new smart lock.
- Clean the deadbolt hole with a vacuum or cloth to remove debris.
- Verify borehole sizes (2-1/8-inch face, 1-inch edge). Adjust with a drill if needed, though most fit standard setups.
- Test-fit the new deadbolt, ensuring smooth operation.
This step, crucial for install smart lock on wooden door, prevents misalignment and takes 5-10 minutes.
Step 3: Installing the Smart Lock
Mount the fingerprint door lock hardware.
- Insert the deadbolt into the edge hole, aligning “up” markings, and secure with screws.
- Mount the exterior assembly (fingerprint scanner or keypad), feeding cables through the borehole.
- Attach the interior mounting plate, connecting cables to the interior unit.
- Secure the interior assembly with screws.
- Install the strike plate on the door frame, aligning with the deadbolt.
Follow the smart lock user guide for adapters. This takes 20-30 minutes.
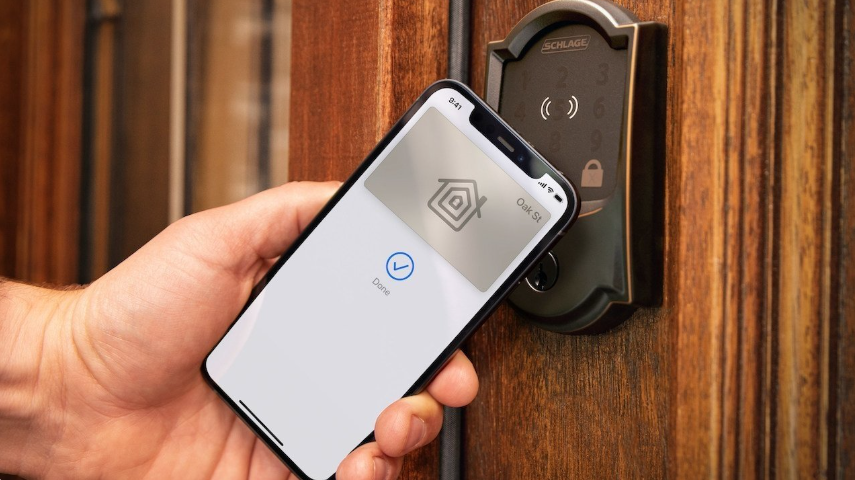
Step 4: Connecting with the App and Phone
Enable fingerprint features with smart lock app connection.
- Download the manufacturer’s app (e.g., August Home, Yale Access).
- Create an account and add a new device.
- Activate pairing mode (usually a button on the interior unit).
- For WiFi models, connect smart lock to WiFi using your 2.4GHz network. Bluetooth models pair directly.
- Register fingerprints via the app, following prompts to scan multiple times for accuracy.
- Calibrate lock/unlock functions and set features like auto-lock.
Ensure proximity to the door and active WiFi/Bluetooth. This takes 10-15 minutes.
Step 5: Testing Functionality
Test to ensure your how to use a fingerprint door lock setup works.
- Manually lock/unlock from both sides.
- Test fingerprint recognition, ensuring quick response.
- Use the app for remote locking (WiFi models).
- Test additional features like keypad codes or voice commands.
- Verify entry notifications on your phone.
Testing, taking 5 minutes, confirms reliability.
Step 6: Troubleshooting Common Issues
Address issues with this smart lock troubleshooting guide:
- Fingerprint not recognized: Re-register fingerprints, ensuring clean fingers and scanner.
- Connection issues: Restart app, reset lock, or check WiFi signal.
- Deadbolt sticking: Realign strike plate or lubricate.
- Battery drain: Use high-quality batteries and disable unused features.
Consult manufacturer support for persistent issues. Troubleshooting ensures you master how to use a fingerprint door lock.
Tips for Successful Installation
With your how to use a fingerprint door lock guide complete, these tips ensure long-term success for your DIY smart lock installation.
Security: Choose a smart lock with strong encryption. Enable two-factor authentication and regularly update firmware. For exterior wooden doors, select weatherproof models to protect the fingerprint scanner.
Signal Placement: Ensure strong WiFi/Bluetooth signals. Wooden doors are ideal, but test connectivity to avoid interference. Use a WiFi extender for connect smart lock to WiFi if needed.
Safety: Install with the door open to avoid lockouts. Store the backup key securely. Teach household members how to use a fingerprint door lock. Schedule smart lock battery replacement every 6 months, using app alerts.
Extras: Integrate with smart home devices for automation. Review model-specific feedback to anticipate quirks. Sync multiple locks for app control. These tips enhance your smart lock setup guide.
Frequently Asked Questions
Questions about how to use a fingerprint door lock? Here are answers to common concerns.
What Happens When the Battery Dies?
Most fingerprint locks include a backup key. App alerts notify you for smart lock battery replacement. Use fresh alkaline batteries to avoid leaks.
Does It Work Without Internet?
Yes, fingerprint and keypad functions work offline. Remote access requires internet. Bluetooth models operate via phone proximity.
Do You Need Professional Installation?
No, this DIY smart lock installation guide suits most users. Professionals are only needed for complex doors, saving you $50-150.
For smart lock troubleshooting, check app error codes. Renters? Many locks are removable without damage.
Conclusion
Mastering how to use a fingerprint door lock transforms your home security with convenience and advanced technology. This smart lock installation guide covers preparation, smart lock app connection, and troubleshooting for a seamless setup in 2025. DIY saves money and empowers customization.
Take on this smart lock setup guide with confidence. Explore more at smart lock to elevate your smart home today!