In today’s fast-paced world, smart home technology is transforming the way we secure our homes, and one of the most popular upgrades is installing a smart lock. If you’re wondering how to install a smart lock, you’re in the right place. A smart lock is an electronic device that replaces your traditional door lock, allowing you to control access remotely via a smartphone app, voice commands, or even fingerprint recognition. Unlike conventional locks that rely on physical keys, smart locks use Bluetooth, WiFi, or Z-Wave connectivity to provide keyless entry, making them ideal for busy families, rental properties, or anyone who wants enhanced security and convenience.
People choose smart locks for several compelling reasons. First, they offer superior security features like auto-locking, activity logs, and notifications for unauthorized attempts. Imagine getting an alert on your phone if someone tries to tamper with your door – that’s peace of mind in real-time. Second, the convenience factor is unbeatable; no more fumbling for keys in the dark or worrying about lost copies. You can grant temporary access to guests, house cleaners, or delivery personnel without handing out physical keys. Plus, integration with other smart home systems, such as Amazon Alexa, Google Home, or Apple HomeKit, allows seamless automation – your door could unlock automatically when you approach with your phone.
However, the thought of installation might seem daunting if you’re not a DIY expert. That’s why this smart lock setup guide is designed to walk you through the process step by step. Whether you’re looking to replace door lock with smart lock on your front entrance or a bedroom door, we’ll cover everything from preparation to troubleshooting. This beginner-friendly tutorial focuses on how to install a smart lock on a wooden door, as it’s the most common type, but the principles apply broadly. By the end, you’ll have the confidence to handle DIY smart lock installation yourself, saving money on professional services. We’ll also touch on smart lock app connection, WiFi setup, and battery management to ensure a smooth experience. Let’s dive in and make your home smarter and safer in 2025!
What You Need Before Installing
Before you embark on how to install a smart lock, proper preparation is key to a successful outcome. Rushing into the project without the right tools or checks can lead to frustration or even damage to your door. This section of our smart lock user guide will outline the essential tools, compatibility considerations, and power requirements to get you started on your smart lock installation journey.
First, gather the necessary tools. Most smart lock kits come with basic hardware, but you’ll need some common household items to complete the job. A standard screwdriver set is essential – both Phillips and flathead types, as different screws may require them. For precise measurements, a tape measure or ruler will help ensure the lock fits perfectly. If your door doesn’t already have the right bore holes, you might need a drill with spade bits (typically 2-1/8 inches for the lock cylinder and 1 inch for the latch). Pliers can be handy for tightening nuts or removing stubborn old hardware. Don’t forget a pencil for marking positions and perhaps a chisel if you need to adjust the strike plate or mortise. Safety gear like gloves and safety glasses is recommended to protect your hands and eyes during drilling or handling sharp edges.
Next, check compatibility. Not every smart lock works with every door type. Focus on your door’s material and thickness – most smart locks are designed for wooden doors between 1-3/8 to 2 inches thick. If you’re planning to install smart lock on wooden door, verify the existing deadbolt setup. Standard U.S. doors have a borehole of 2-1/8 inches, but measure yours to confirm. For connectivity, ensure your smart lock supports your home’s network. WiFi-enabled models require a stable 2.4GHz connection (many don’t support 5GHz), while Bluetooth-only versions need your phone to be in range. If your router is far from the door, consider a WiFi extender. Also, check if the lock integrates with your smart home ecosystem – for example, compatibility with hubs like Samsung SmartThings or Ring.
Power sources are another critical aspect. Most smart locks run on batteries, typically four AA or AAA alkaline batteries, which last 6-12 months depending on usage. Some models use rechargeable lithium-ion packs, so factor in charging needs. Hardwired options exist for doors with existing wiring, but they’re less common for DIY projects. Always have spare batteries on hand for smart lock battery replacement during setup. If your lock has a keypad, ensure it’s weatherproof if installed outdoors. Finally, download the manufacturer’s app in advance and create an account. This pre-step makes smart lock app connection smoother later. By preparing these elements, you’ll avoid common pitfalls in DIY smart lock installation and set yourself up for success. Remember, if your door is metal or has unusual dimensions, consult the product manual or a professional to avoid compatibility issues.
Step-by-Step Installation Guide
Now that you’re prepared, let’s get into the heart of this guide: how to install a smart lock with detailed, beginner-friendly steps. This smart lock setup guide assumes you’re working on a standard wooden door with an existing deadbolt. If your door lacks a deadbolt, you may need to drill new holes – we’ll cover that briefly. Follow these instructions carefully for a seamless smart lock installation. The process typically takes 30-60 minutes, depending on your experience.
Step 1: Removing the Old Lock
Start by uninstalling your existing door lock. This is crucial when you replace door lock with smart lock. Open the door for easy access to both sides. Locate the screws on the interior side of the lock – usually two or three holding the inside plate. Use your screwdriver to remove them, then pull off the interior assembly. Next, unscrew the exterior cylinder or knob. The deadbolt latch on the door’s edge is secured by two screws; remove those and slide out the latch mechanism. If it’s stuck, gently pry with pliers. Clean any debris from the holes to prepare for the new smart lock.
Step 2: Preparing the Door
With the old lock removed, inspect and prepare the door. Measure the backset – the distance from the door edge to the center of the borehole – it’s usually 2-3/8 or 2-3/4 inches. Your smart lock should match this; adapters are often included if not. If installing on a new door or one without holes, mark the positions using the template provided in the kit. For the main borehole, drill a 2-1/8-inch hole through the door face. Then, drill a 1-inch hole on the edge for the latch. Use a chisel to create a mortise (recess) for the latch plate if needed. This step is especially important when you install smart lock on wooden door to ensure a flush fit.
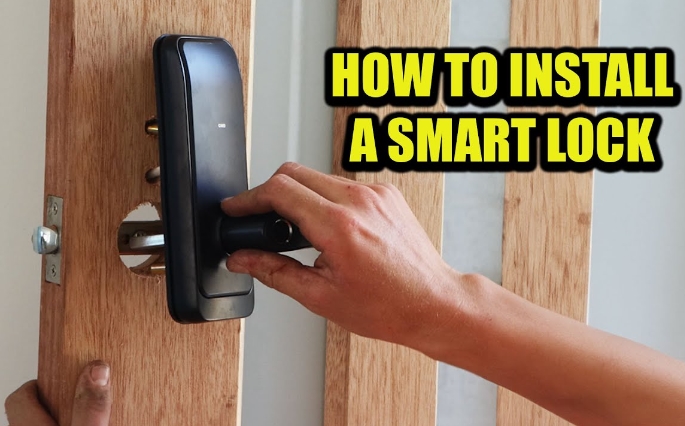
Step 3: Installing the Smart Lock Hardware
- Insert the latch into the edge hole, ensuring the beveled side faces the door jamb. Secure with screws.
- Align the exterior assembly (keypad or touchscreen) with the borehole and feed the cable through.
- On the interior side, connect the cable to the mounting plate or directly to the interior unit.
- Attach the interior assembly, tightening screws evenly to avoid misalignment.
- Install the strike plate on the door frame if the old one doesn’t fit, using provided screws.
Test the mechanical operation manually – the bolt should extend and retract smoothly without sticking.
Step 4: Connecting the Smart Lock to the App and WiFi
Power up the lock by inserting batteries. Download the app (e.g., August, Schlage, or Yale app) and follow prompts for smart lock app connection. Enable Bluetooth on your phone and pair the device – it should detect automatically. For WiFi models, connect smart lock to WiFi by entering your network credentials in the app. This step enables remote access. Create user codes, set auto-lock timers, and integrate with voice assistants if desired.
Step 5: Testing Functionality
Thoroughly test your new setup. Lock and unlock via the app, keypad, and physical key (if included). Check notifications for activity. Walk away and confirm auto-lock engages. Invite a family member to test guest access. If issues arise, refer to smart lock troubleshooting below.
Smart Lock Troubleshooting
Common problems during installation include misalignment causing jamming – double-check screws and alignment. If the app won’t connect, ensure Bluetooth/WiFi is strong and restart your phone. Battery issues? Verify correct insertion and use fresh ones. For “no response” errors, reset the lock per the manual. If the bolt doesn’t extend fully, adjust the strike plate. Persistent issues might require firmware updates via the app. Always consult the smart lock user guide for model-specific fixes.
By following this step-by-step guide, you’ll master how to install a smart lock efficiently. Remember, patience is key in DIY smart lock installation.

Tips for Successful Installation
Even with a solid guide on how to install a smart lock, a few extra tips can elevate your experience and ensure long-term reliability. This section focuses on security, optimal placement for signals, and safety measures to make your smart lock installation foolproof.
Security should be your top priority. Choose a smart lock with strong encryption like AES-128 to protect against hacking. Enable two-factor authentication in the app and use complex user codes. Regularly review access logs for suspicious activity. For outdoor installations, opt for weather-resistant models rated IP65 or higher to withstand rain and temperature fluctuations.
WiFi and Bluetooth signal strength greatly impacts performance. Position your router or a mesh extender close to the door – ideally within 30 feet for reliable connection. Metal doors or thick walls can interfere, so test signal strength before finalizing. If using Bluetooth, remember range is limited to about 30-50 feet; WiFi extends this globally. During setup, avoid interference from other devices by temporarily disabling nearby electronics.
Safety precautions are essential in any DIY project. Work in a well-lit area and unplug drills when not in use. If drilling, wear eye protection and secure the door to prevent slipping. For battery-powered locks, handle cells carefully to avoid leaks – always use the recommended type for smart lock battery replacement. If you’re uncomfortable with any step, like wiring for powered models, consider professional help. Finally, after installation, inform household members about emergency overrides, such as using a physical key if the battery dies.
Incorporating these tips into your smart lock setup guide routine will minimize errors and maximize benefits. Whether it’s enhancing security or ensuring seamless smart lock app connection, a little foresight goes a long way in DIY smart lock installation.
Frequently Asked Questions
What Happens When the Battery Dies?
If your smart lock’s battery runs low, most models send app notifications in advance. When it dies, the electronic features pause, but you can still use a physical key (if included) or an external battery pack via a USB port on some locks. Plan for smart lock battery replacement every 6-12 months to avoid this.
Does It Work Without Internet?
Yes, many smart locks function offline via Bluetooth or keypad codes for local access. However, remote control, notifications, and integrations require WiFi. If internet goes down, basic locking/unlocking remains operational, making them reliable even in outages.
Do You Need Professional Installation?
No, most people can handle DIY smart lock installation with basic tools, as outlined in this guide. If your door is unconventional (e.g., very thick or antique), or if you’re not handy with tools, hiring a pro ensures proper fit and avoids warranty issues. Costs range from $50-150, but DIY saves money.
Conclusion
In summary, learning how to install a smart lock opens the door to a more secure, convenient home. From removing your old lock to mastering smart lock troubleshooting and app connections, this guide equips you with the knowledge for successful DIY smart lock installation. The benefits – keyless entry, remote monitoring, and integration with smart ecosystems – far outweigh the initial effort, especially in 2025 when smart homes are the norm.
Don’t hesitate to tackle this project yourself; with the right preparation and our step-by-step smart lock setup guide, you’ll achieve professional results. For more options and reviews, explore the best smart lock choices on our homepage. Upgrade today and enjoy the peace of mind a smart lock provides!